Requirements for creating a video membership website
Building your video membership website starts with installing the essential tools: Memberpress, Vimeotheque, and Vimeotheque PRO. These plugins lay the groundwork for your website’s functionality, enabling you to provide exclusive video content to your members.
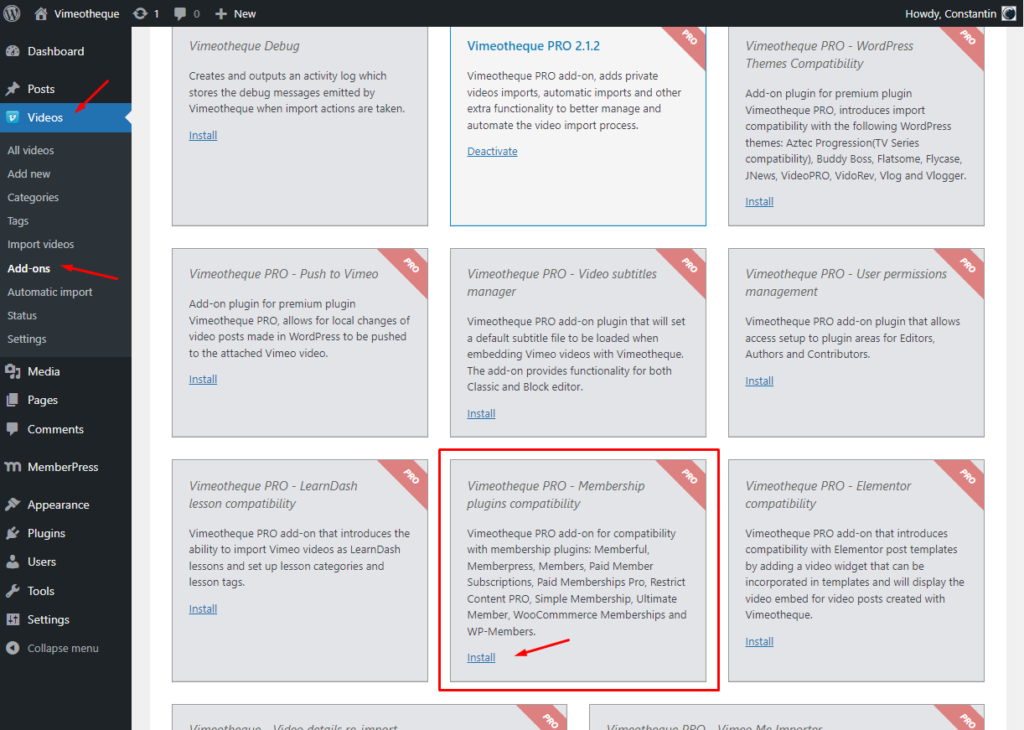
To ensure seamless compatibility between MemberPress and Vimeotheque, it’s vital to incorporate the Vimeotheque Membership Add-on into your website. This add-on seamlessly integrates with MemberPress, unlocking a range of advanced features and functionalities that are specifically designed to enhance the membership experience on your video website.
How to install the Vimeotheque Membership Add-on
Memberpress setup for video membership website
The next step is to setup Memberpress, the plugin that will manage all subscriptions on the video membership website.
We will start by creating a Payment method in Memberpress, next we will create a Membership level that users can purchase to gain access to paid video content and last, we will create a Rule in Memberpress that will protect the video content from unauthorized access and will require users to subscribe in order to view the paid videos from our website.
1. Create a payment method in Memberpress
MemberPress comes with built-in support for various payment methods including PayPal (Standard, Express, and Pro), Stripe, and Authorize.net. Setting up your preferred payment method is easy – just select it and enter the necessary credentials.
If you wish, you have the flexibility to add multiple payment methods. For example, you can add Stripe as the primary option and also include PayPal as an alternative for users who prefer not to disclose their credit card information.
Remember to save your settings by clicking the Update Options button after adding your preferred payment methods. This ensures that your changes are applied before proceeding to the next step.
2. Create a membership plan for video membership website
Now, it’s time to generate various subscription tiers that users can choose from.
For example, you have the flexibility to design plans with unique benefits, different levels of access, and additional features. Additionally, you can even establish a free membership option, allowing users to enjoy demo videos and access free content.
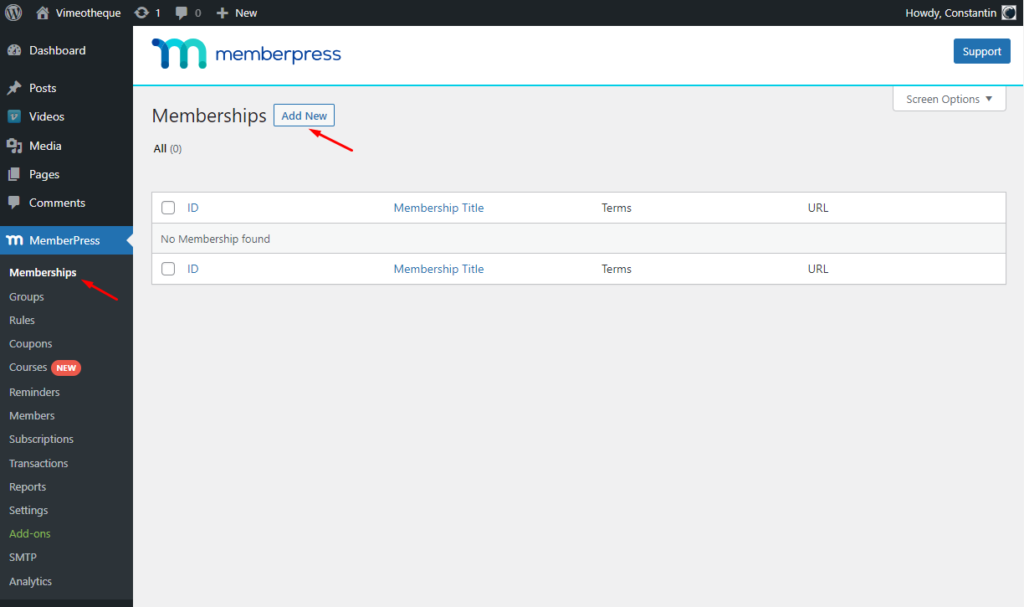
To create a fresh membership plan, navigate to the MemberPress » Memberships page and select the ‘Add New’ button located at the top.
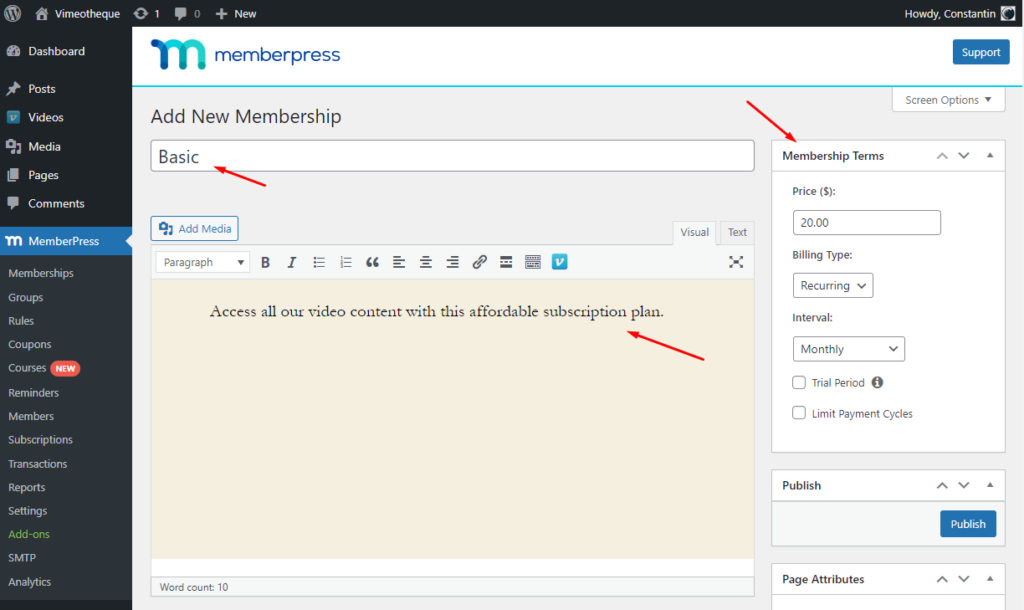
On the following page, you will be required to enter a title for the membership plan and provide further details in the post editor.
Then, proceed to the ‘Membership Terms’ section located in the right column, where you can establish the pricing, billing type, interval, and expiration for this specific plan.
3. Create access rules for video membership plan
Once you have successfully configured your membership levels, the subsequent task is to establish access rules.
MemberPress offers robust access control rules, empowering you to limit access to specific content on your website depending on a user’s membership plan.
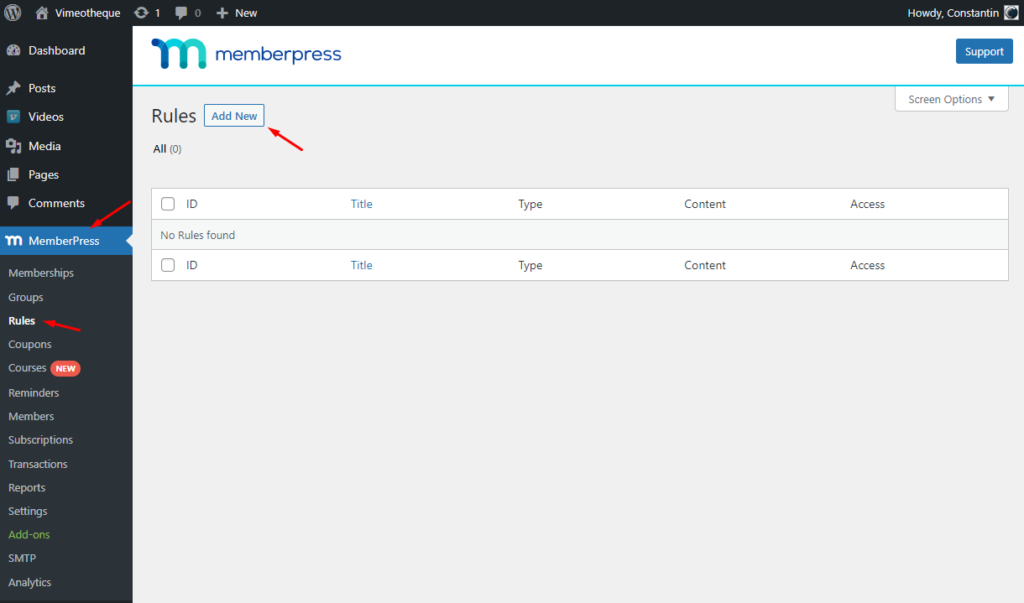
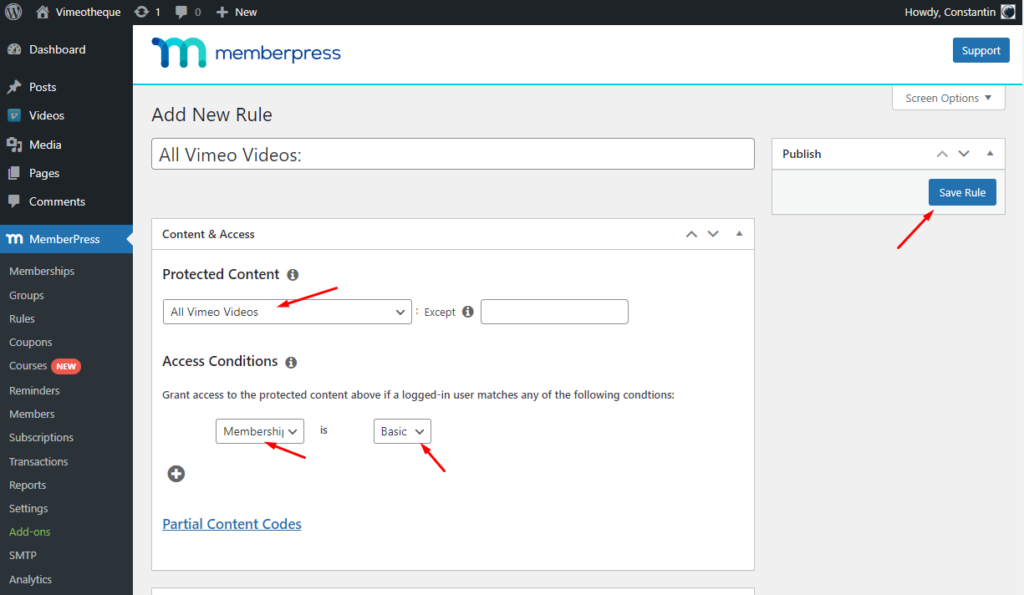
To configure these rules, navigate to the MemberPress » Rules page and initiate the process by clicking on the Add New button, which will enable you to create a new rule.
In the next screen we will choose to protect all video posts imported by Vimeotheque. To do this, from the Protected Content select “All Vimeo Videos“, which is the post type created by Vimeotheque and next choose from Access Conditions to protect the video posts and display them only if users are logged in and have a Basic membership (the membership we created in step 2).
Importing video content for the video membership website
Importing your Vimeo videos into WordPress with Vimeotheque is a simple task. Before being able to start importing, you should setup and get started with Vimeotheque.
After a seamless setup, Vimeotheque PRO becomes an invaluable tool, automating the process of importing your video content from Vimeo to WordPress.
This allows you to focus your efforts on producing new videos to provide your subscribers with fresh content.